The Deviled Eggs Dip is the culinary transformation of a classic holiday staple into a crowd-pleasing, scoopable masterpiece. Imagine the nostalgic flavor of a perfectly seasoned deviled egg, but reimagined with a luxurious, whipped texture that invites everyone to dive in with a cracker.
This recipe focuses on the contrast between a silky, mousse-like yolk foundation and the rustic, tender bite of hand-chopped egg whites. Every spoonful delivers a punch of tang from yellow mustard and the deep, earthy warmth of smoked paprika.
By deconstructing the traditional stuffed egg, we eliminate the tedious filling process while enhancing the sensory experience. Whether you are hosting a summer backyard bash or a cozy holiday gathering, this dip is designed to be the centerpiece of your snack table.
Why This Reimagined Deviled Eggs Dip Will Be Your New Go-To
- Unrivaled Texture: We use a high-speed whipping technique for the yolks to create an airy, cloud-like base that far surpasses the density of a standard stuffed egg.
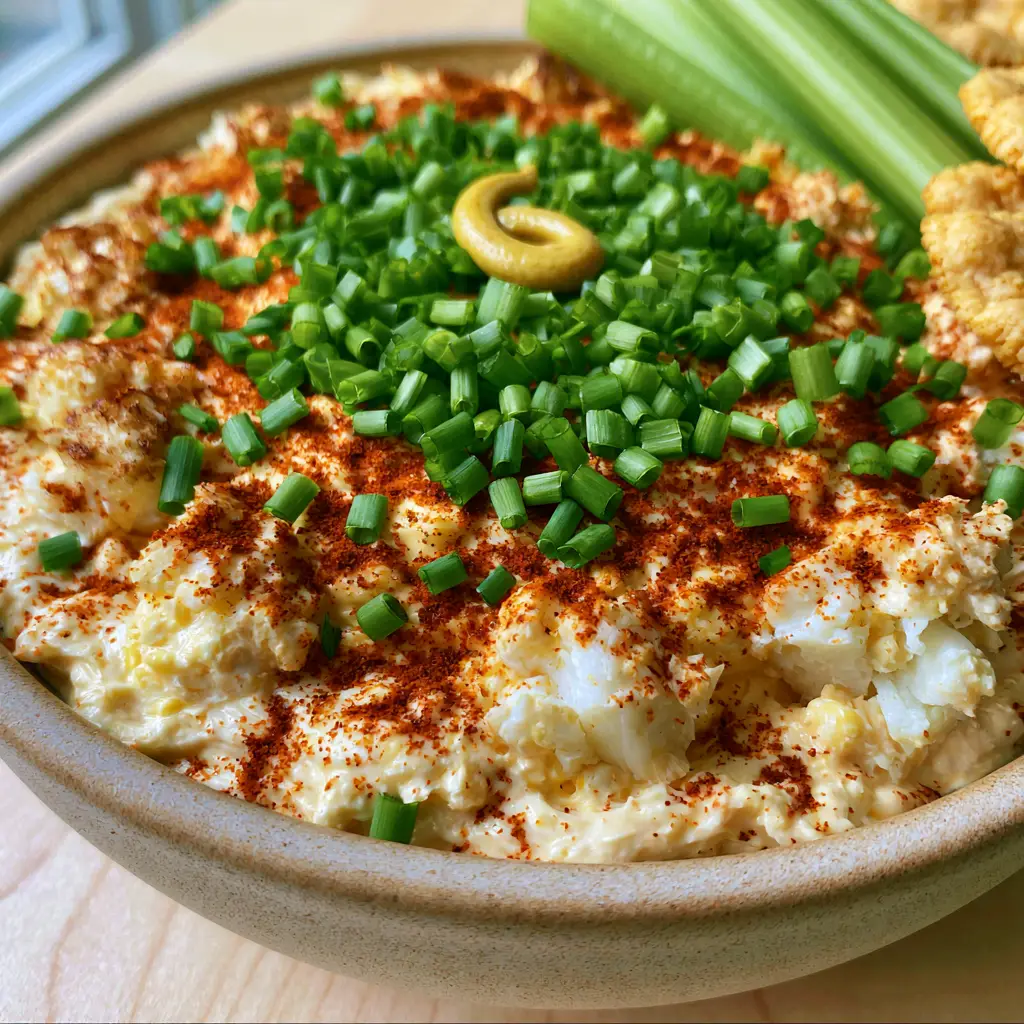
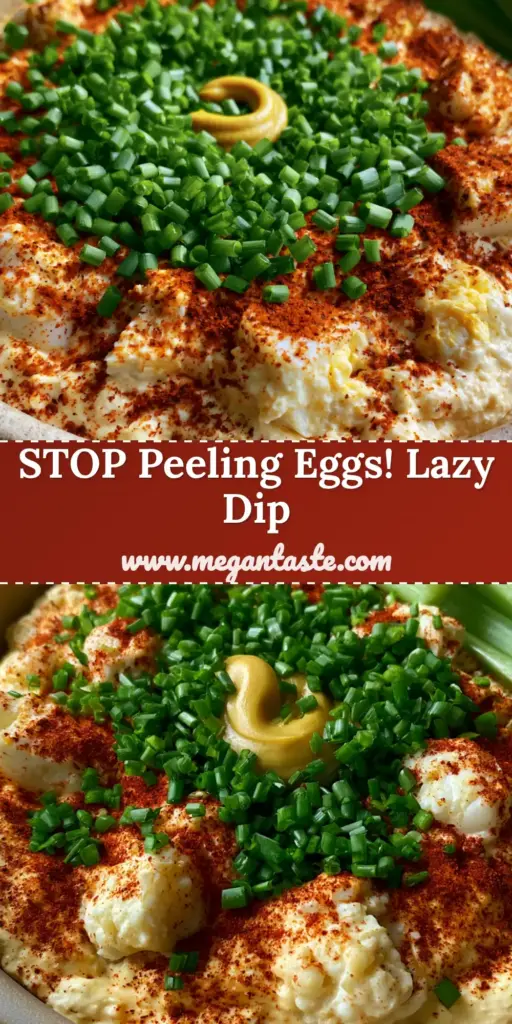
- Visual Sophistication: With a heavy dusting of vibrant red smoked paprika and a dense forest of fresh green chives, this dish looks as professional as it tastes.
- Effortless Entertaining: No more struggling with pastry bags or torn egg whites; this “deconstructed” approach is built for speed and high-volume serving.
- Keto-Friendly Versatility: Naturally low-carb, this dip pairs perfectly with fresh vegetables or golden flaxseed crackers to satisfy every guest’s dietary needs.
Essential Components for the Perfect Creamy Base
Large Farm-Fresh Eggs: Use 12 large eggs to ensure you have enough yolk volume for a thick, stable emulsion and plenty of whites for that signature “chunky” texture. The quality of the yolk directly impacts the richness of the dip.
High-Quality Mayonnaise: 3/4 cup (180ml) of mayo provides the lipid structure needed to carry the flavors of the sulfurous eggs and tangy seasonings. It acts as the primary binder for the whipped yolk mousse.
Classic Yellow Mustard: 2 tbsp (30g) of mustard adds the essential acetic acidity that cuts through the richness of the fats. We also reserve a portion for a stunning visual swirl on the final surface.
Apple Cider Vinegar: 1 tsp (5ml) of vinegar brightens the overall profile and ensures the dip doesn’t feel heavy on the palate. It helps to stabilize the egg proteins during the whipping process.
Smoked Paprika: A generous 1 tbsp (7g) dusting provides a campfire-like depth and a striking color contrast against the pale yellow dip. It adds a layer of “culinary forensics” that mimics the classic deviled egg look.
Fresh Chives: 1/4 cup (10g) of finely minced chives offers a mild allium bite and a refreshing crunch. The bright green color is essential for the visual “pop” described in our blueprint.
Fine Sea Salt and White Pepper: 1/2 tsp (3g) of each ensures the dip is seasoned to the core. White pepper is used specifically to maintain a clean, speckle-free aesthetic in the yellow base.
Professional Tools for Culinary Success
To achieve the specific handheld-photo-ready look of this Deviled Eggs Dip, you will need a few key pieces of equipment. A large pot is required for the initial 12-minute hard-boil of the eggs.
A food processor or high-speed electric hand mixer is vital for whipping the yolks and mayo into a “thick, whipped foundation.” Using a fork will not incorporate enough air to achieve the desired mousse-like consistency.
Finally, a shallow, matte-finished ceramic bowl is the ideal vessel for presentation. This type of bowl allows for more surface area, meaning more room for that “heavy dusting” of paprika and chives.
The Science of Boiling and Peeling Your Eggs
Achieving the Perfect Hard-Boil
Place your 12 eggs in a single layer at the bottom of a large pot and cover with cold water by at least one inch. Bring the water to a rolling boil over high heat, then immediately remove from the burner and cover with a lid.
Let the eggs sit in the hot water for exactly 12 minutes; this timing ensures the yolks are fully set and vibrant yellow without the unappealing green ring of overcooking. Prepare an ice bath while you wait to “shock” the eggs and stop the cooking process immediately.
The Art of the Clean Peel
After 10 minutes in the ice bath, gently crack the shells all over. The cold shock creates a slight contraction of the egg protein, pulling it away from the membrane and making the shells slide off effortlessly.
Once peeled, pat the eggs dry with a paper towel. Moisture is the enemy of a thick dip; any residual water will thin out your mayo and prevent the “rustic chunks” of egg whites from holding their shape.
Constructing the Whipped Yolk Foundation
Separating and Whipping
Slice the eggs in half and pop the yolks into your food processor. Set the whites aside on a cutting board; we will treat these separately to ensure we don’t end up with a mushy paste.
Add the mayo, 1 tbsp (15g) of mustard, vinegar, salt, and white pepper to the yolks. Process on high for 45-60 seconds until the mixture is completely smooth and noticeably paler in color—this is your “thick, whipped egg yolk and mayo foundation.”
Preparing the Rustic Egg White Chunks
While the yolks are whipping, take your knife and roughly chop the egg whites. Aim for pieces that are about 1/4 inch (0.5cm) in size to provide a “tender” and “rustic” mouthfeel that contrasts with the base.
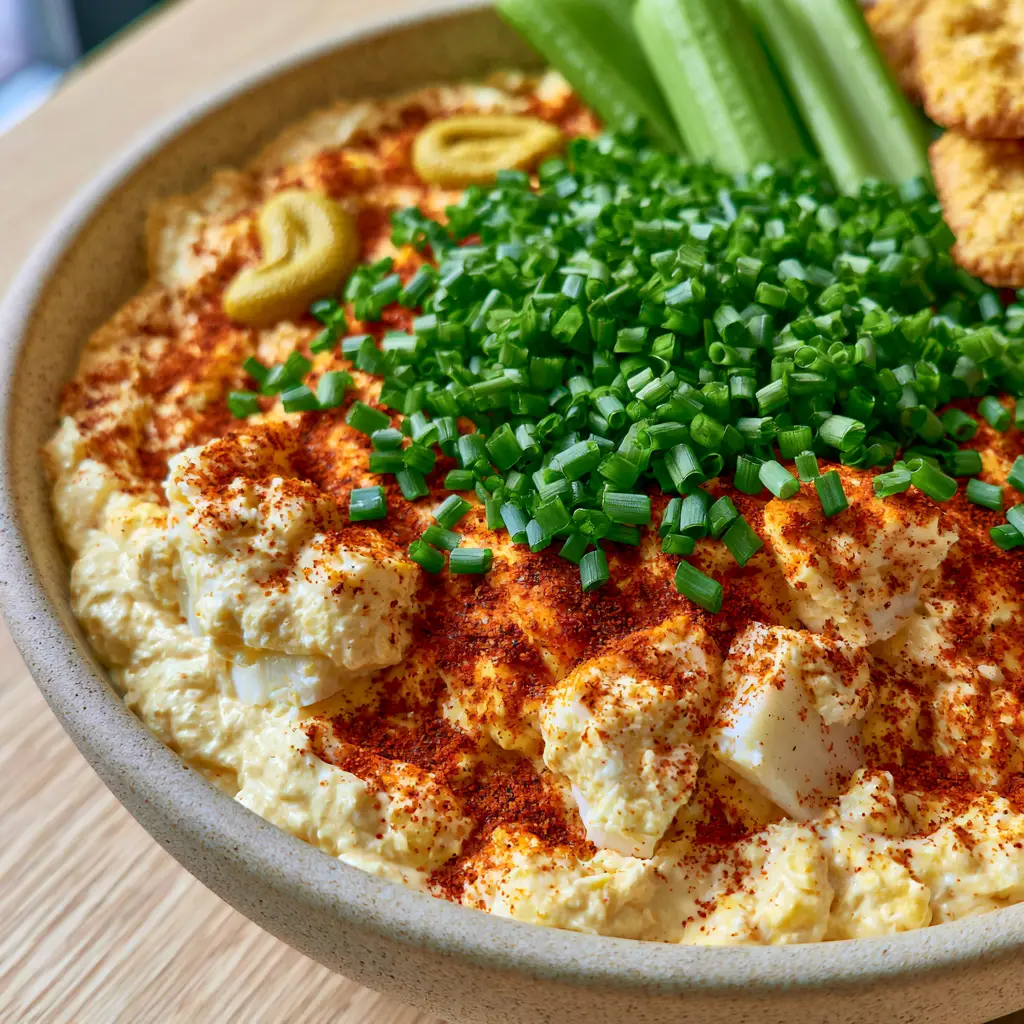
Fold about 75% of these chunks into the whipped yolk mixture using a spatula. Reserved the remaining 25% to scatter across the top, which creates the “high-texture” visual seen in professional food photography.
Plating for Maximum Visual Impact
Transfer the mixture to your matte ceramic bowl. Use the back of a spoon to create small divots and peaks on the surface, which will catch the light and the toppings.
Take your remaining mustard and create a “single swirl” through the center. This adds a professional “chef’s touch” and hints at the tangy flavor profile hidden within the dip.
Apply a “heavy dusting” of smoked paprika, followed by a “dense layer” of chives. The goal is to cover enough of the surface so that the pale yellow base only peeks through occasionally, creating a vibrant red and green tapestry.
Pro Secrets for the Creamiest Egg Emulsion
- Room Temperature Ingredients: Ensure your mayo and eggs aren’t ice-cold when mixing; room-temp fats emulsify more smoothly with the proteins.
- The Sieve Trick: For a truly “elite” texture, press your hard-boiled yolks through a fine-mesh sieve before whipping them with the mayo.
- Don’t Over-Process the Whites: Always hand-fold the chopped whites; using the food processor for this step will turn your dip into a greyish slurry.
- Flavor Development: Let the Deviled Eggs Dip chill in the refrigerator for at least 30 minutes before serving to allow the smoked paprika and mustard flavors to meld.
How to Keep Your Dip Fresh and Vibrant
This dip is best enjoyed the day it is made, as the chives are at their most vibrant and the egg whites are at their most tender. If you have leftovers, store them in an airtight container for up to 3 days.
Do not freeze this dip; the emulsion of the mayo and the cellular structure of the egg whites will break down, resulting in a watery, unappealing mess upon thawing. If the dip thickens too much in the fridge, stir in a teaspoon of room-temp water or mayo to loosen it back up.
What to Serve with Your Deviled Eggs Dip
To truly embrace the “culinary logic” of this dish, you need the right dipping vessels. Crisp green celery sticks are a non-negotiable requirement, providing a refreshing water-based crunch that cleanses the palate.
For a hearty, keto-friendly option, serve with golden flaxseed crackers. Their nutty flavor profile complements the smokiness of the paprika beautifully. If you are looking to round out a full appetizer spread, consider pairing this with addictive crack corn dip or a zesty fruit salsa.
For a larger gathering, this dip sits wonderfully next to hearty sides like Chicken Bacon Ranch Pasta Salad or a bowl of Crunchy Asian Ramen Salad. These dishes provide a variety of textures that keep guests coming back for more.
Frequently Asked Questions
Yes, you can prepare the dip up to 24 hours in advance. However, wait to add the smoked paprika and fresh chives until just before serving to keep the colors vibrant and prevent the paprika from bleeding into the base.
You can substitute half the mayo with Greek yogurt for a tangier, higher-protein version. However, keep in mind that yogurt has more moisture, so the dip may be slightly less ‘whipped’ and airy than the original version.
The green ring is caused by overcooking. Stick to the 12-minute ‘off-heat’ method and immediately shock the eggs in an ice bath to stop the cooking process and preserve the bright yellow color.
Golden flaxseed crackers or keto-friendly almond flour crackers are excellent choices. Their sturdy texture holds up to the thick whipped base without breaking, and their nutty flavor complements the eggs perfectly.
A watery dip usually happens if the hard-boiled eggs weren’t dried thoroughly after peeling or if the mayo separated. Ensure your eggs are bone-dry and use a high-quality, full-fat mayonnaise for the best emulsion.
The Ultimate Deviled Eggs Dip Recipe
Deviled Eggs Dip: The Ultimate Creamy Party Appetizer
Ingredients
Equipment
Method
- Place eggs in cold water, bring to boil, then cover and remove from heat for 12 minutes. Shock in an ice bath.
- Peel eggs and separate yolks into a food processor bowl. Place whites on a cutting board.
- Add mayo, 1 tbsp mustard, vinegar, salt, and pepper to yolks. Process until smooth and airy.
- Roughly chop egg whites into 1/4 inch rustic chunks.
- Gently fold most of the whites into the whipped yolk base.
- Spread into a bowl. Add a mustard swirl, heavy paprika dusting, and dense chive layer.
Notes
Whip the yolks for at least 60 seconds for the fluffiest texture.
Join the Community and Share Your Creation!
The Deviled Eggs Dip is more than just a recipe; it’s a conversation starter for your next party. The combination of whipped elegance and rustic texture makes it a standout dish that guests will be asking for long after the bowl is licked clean.
If you loved this twist on a classic, please leave a comment below and let me know how it turned out! Don’t forget to follow me on Pinterest for more visually stunning recipes and party inspiration.
Sign up for our newsletter to get the latest kitchen secrets delivered straight to your inbox. Happy dipping!