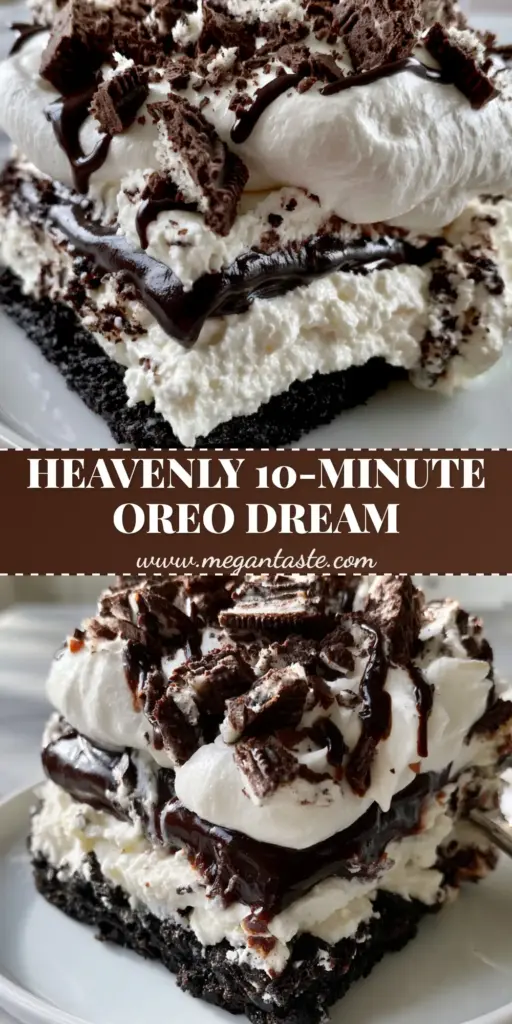
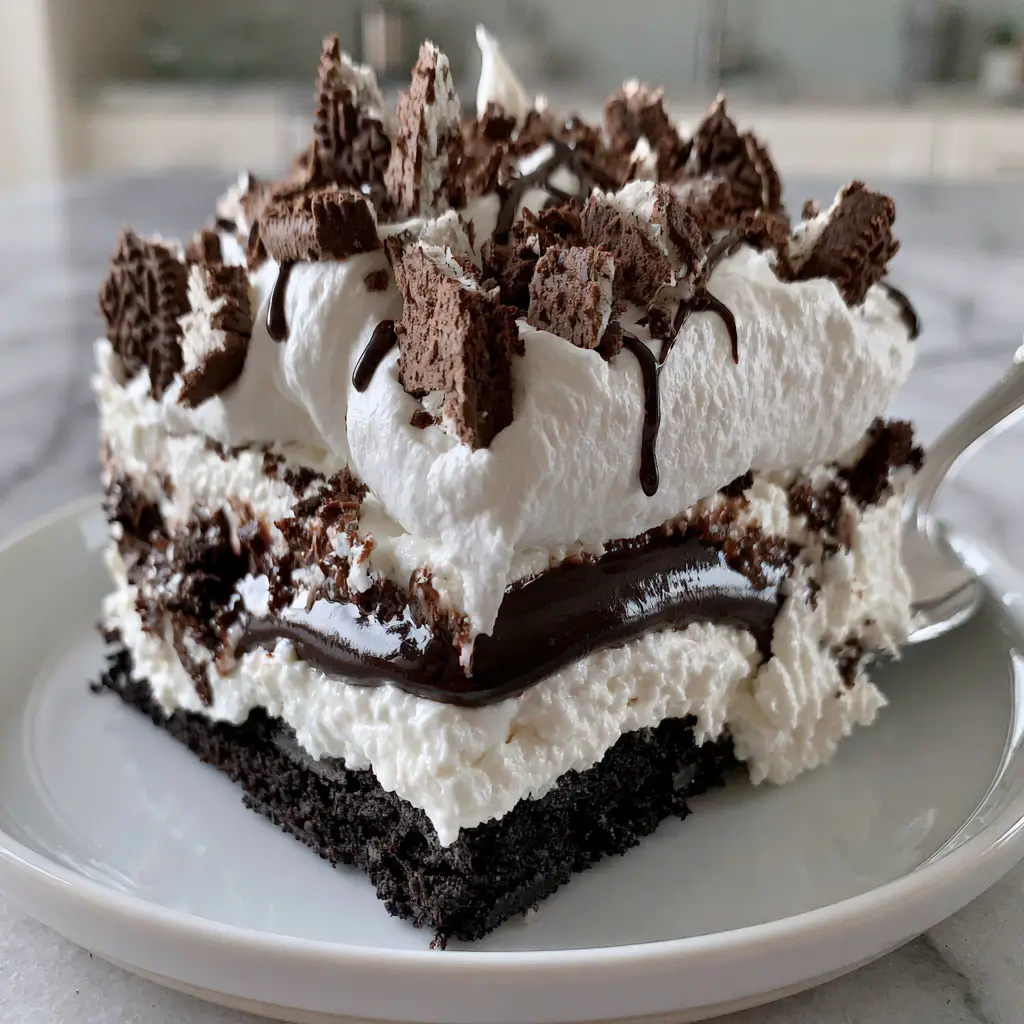
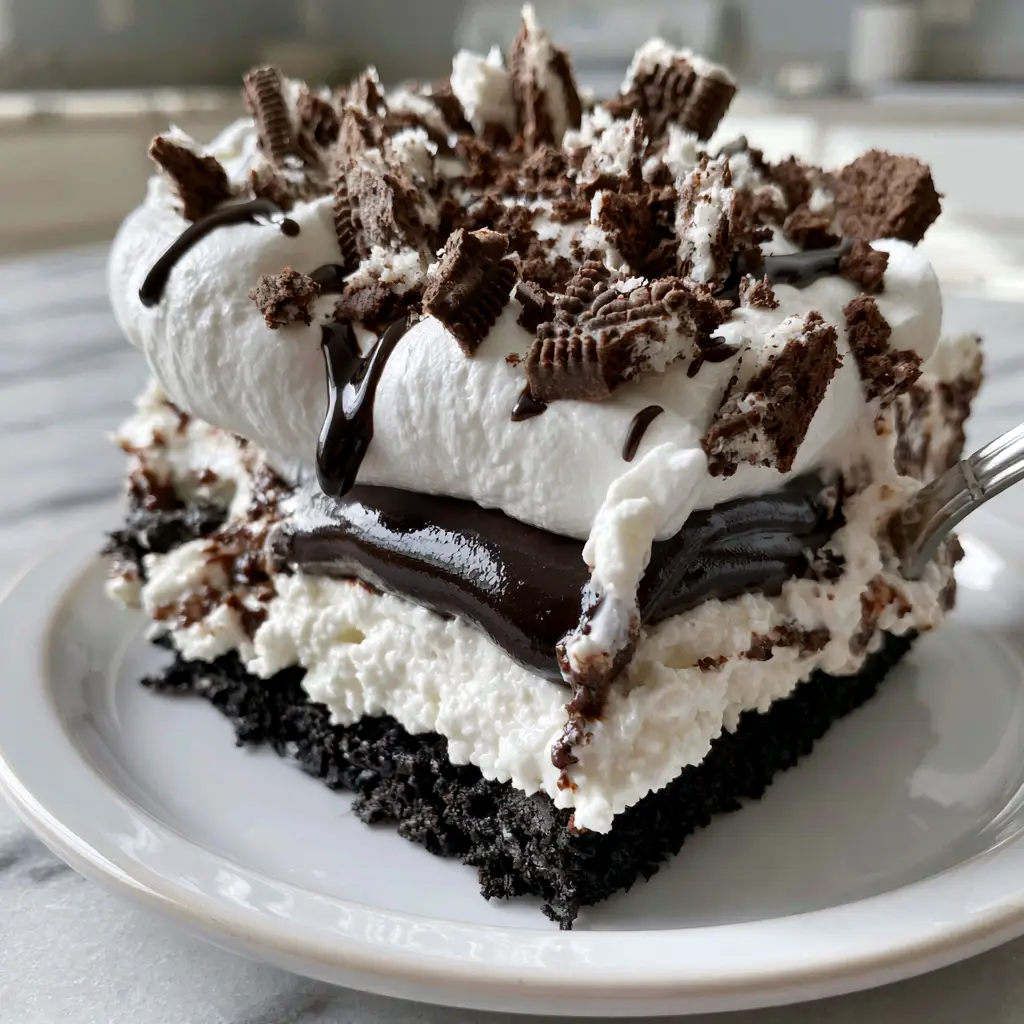
There is something undeniably hypnotic about the architecture of a perfect no bake oreo dessert. Imagine sinking your spoon through four distinct, decadent strata: a jet-black compressed crust, a snow-white cream cheese fluff, a glossy ebony pudding, and a pillowy cloud of whipped cream. This isn’t just a quick treat; it is a structural masterpiece that delivers a symphony of textures in every bite.
When you pull this dish from the refrigerator, the first thing you’ll notice is the striking contrast. The deep, dark chocolate layers pop against the brilliant white cream, just like the handheld smartphone photos that capture its raw, unedited beauty. Whether you are hosting a summer gathering or a cozy holiday dinner, this dessert is the ultimate crowd-pleaser that requires zero oven time.
Our culinary forensics team has deconstructed the classic “Oreo Lasagna” to ensure every layer maintains its integrity. We’ve focused on the science of compression for the base and the perfect stabilization of the cream layers. The result is a thick square slice that holds its shape on the plate, revealing a beautiful interior texture when your silver spoon finally makes its immersion.
Why This No Bake Oreo Dessert is a Total Game Changer
- Unmatched Textural Contrast: You get the crunch of jagged Oreo chunks against the silky, glossy chocolate pudding.
- No-Bake Simplicity: Achieve professional-grade results without ever turning on your oven, making it perfect for hot summer days.
- Structural Integrity: Our recipe uses specific ratios to ensure the layers don’t bleed into one another, giving you those clean, photo-ready lines.
- Visual Showstopper: With a delicate dark chocolate drizzle and broken cookie garnishes, it looks like it came from a high-end bistro.
The Anatomy of Ingredients: What You’ll Need
Every element in this no bake oreo dessert has been selected to mirror the visual blueprint of a professional “Oreo Lasagna.” From the fat content in the cream cheese to the specific type of cocoa in the cookies, every detail matters for both flavor and physics.
Standard Oreo Cookies (14.3 oz / 405g): You will need a full family-sized pack. Most of these will be pulverized for the “jet-black compressed base,” while a handful are reserved for those “jagged, chunky pieces” on top.
Unsalted Butter (1/2 cup / 115g): Melted butter acts as the hydraulic binder for your crust. It seeps into the cookie crumbs and solidifies in the fridge, creating that dense, compressed foundation described in our visual prompt.
Cream Cheese (8 oz / 225g): Ensure this is full-fat and completely softened to room temperature. This provides the structural “tang” and body for the “velvety snow-white fluff” layer.
Powdered Sugar (1 cup / 120g): This sweetens the cream cheese layer while adding fine-particle stability. Unlike granulated sugar, it dissolves instantly, ensuring a smooth, grit-free mouthfeel.
Whipped Topping (16 oz / 450g): You will divide this between the cream cheese layer and the final “pillowy cloud” topping. It provides the high-volume loft required for that cloud-like visual effect.
Instant Chocolate Fudge Pudding (Two 3.9 oz boxes): Using “Fudge” or “Dark Chocolate” flavor is the secret to achieving that “deep-ebony” glossy finish. It sets faster and firmer than cooked pudding varieties.
Cold Whole Milk (3 cups / 710ml): Cold milk is scientifically required to react with the modified cornstarch in instant pudding. Whole milk provides the necessary fat for a “glossy” rather than “matte” finish.
Dark Chocolate Chips (1/4 cup / 45g): These are melted with a splash of cream to create the “delicate dark chocolate drizzle” that finishes the dish. This adds a refined, bitter-sweet edge to the topping.
Essential Equipment for a Professional Finish
To achieve the 45-degree angle perfection seen in our visual guide, you need more than just a bowl and a spoon. The right tools ensure your layers are level and your slices are sharp.
9×13 Inch Ceramic or Glass Baking Dish: A clear glass dish is preferred if you want to see the “ebony and ivory” layers from the side. It helps in verifying the thickness of each strata before you serve.
Food Processor: This is vital for achieving the “jet-black” fine crumb required for a compressed base. If you don’t have one, a heavy rolling pin and a freezer bag will work, though it requires more elbow grease.
Offset Spatula: This is the secret weapon of professional bakers. It allows you to smooth the pudding and cream cheese layers to a perfectly flat, level surface without disturbing the layer beneath it.
Stand Mixer or Hand Mixer: You need high-speed aeration to turn the cream cheese and sugar into a “velvety fluff.” Manual whisking rarely achieves the necessary “snow-white” volume.
Step-By-Step Architecture: Constructing the Layers
Building a no bake oreo dessert is an exercise in patience and precision. Follow these steps to ensure your “thick square slice” looks exactly like our Midjourney prompt.
Phase 1: The Jet-Black Compressed Foundation
Begin by pulsing 36 Oreo cookies in a food processor until they reach a fine, sandy consistency. Avoid leaving large chunks at this stage, as they will prevent the crust from compressing properly.
Pour in your melted butter and pulse until the crumbs look like wet black sand. Press this mixture firmly into the bottom of your dish using the back of a flat measuring cup. Chill this in the freezer for 10 minutes to “lock” the structure before adding the next layer.
Phase 2: The Snow-White Cream Cheese Fluff
In a large bowl, beat the softened cream cheese and powdered sugar until completely smooth and aerated. It should look like a thick, glossy frosting with no visible lumps.
Gently fold in half of your whipped topping (8 oz). Use a slow, circular motion to maintain the “high-volume” air bubbles. Spread this over the chilled crust using your offset spatula, ensuring you reach the very corners of the dish.
Phase 3: The Glossy Deep-Ebony Pudding
In a separate bowl, whisk together the two boxes of instant chocolate fudge pudding and the cold whole milk. Continue whisking for exactly two minutes until the mixture begins to thicken and takes on a glossy sheen.
Immediately pour the pudding over the cream cheese layer. Because the cream cheese is cold, the pudding will begin to set quickly. Work fast to smooth it out before it loses its “glossy” workable texture.
Phase 4: The Pillowy Top and Garnish
Spread the remaining whipped topping over the pudding layer. Do not press down hard; you want to create a “pillowy cloud” effect with natural peaks and valleys that catch the light.
Take your remaining Oreo cookies and break them by hand into “jagged, chunky pieces.” Sprinkle these generously over the top. Finally, melt your dark chocolate chips with a teaspoon of cream and use a fork to create a “delicate drizzle” across the entire surface.
Expert Tips for the Perfect Thick Square Slice
- The “Freezer Flash”: For the cleanest layers, pop the dish in the freezer for 5 minutes between each layer. This creates a “skin” on the previous layer that prevents the next one from mixing in.
- Wipe the Knife: To get the “silver spoon immersion” look in a full slice, wipe your knife with a warm, damp cloth between every single cut. This prevents the dark pudding from smearing onto the white cream cheese.
- Avoid “Lite” Products: This is not the place for low-fat cream cheese or skim milk. The fat content is what provides the structural “stiffness” required for a standing slice.
- Chilling is Non-Negotiable: This dessert needs at least 4 hours—ideally overnight—to set. The cookie base needs time to soften slightly into a “fudgy” texture, while the pudding needs time to fully hydrate.
Serving Suggestions & Pairing Ideas
This no bake oreo dessert is quite rich, so it pairs beautifully with lighter, acidic, or savory elements to cleanse the palate. If you are hosting a summer cookout, consider serving this after a refreshing summer pasta salad or a vibrant peach avocado salsa with chips.
For a full “comfort food” menu, this chocolate lasagna follows perfectly after a main course of chicken bacon ranch pasta salad. If you’re looking for more varied textures for a party spread, our deviled eggs dip or a tray of cheesy zucchini tots provides the perfect savory balance to the deep chocolate of the Oreos.
How to Store Your Oreo Masterpiece
Refrigeration: Keep the dessert covered with plastic wrap or a tight-fitting lid. It will stay fresh and hold its structure for up to 5 days. In fact, many people find it tastes even better on day two once the flavors have fully melded.
Freezing: This recipe freezes exceptionally well! You can freeze the entire dish for up to 3 months. To serve, let it thaw in the fridge for about an hour. It will have a texture similar to an ice cream cake—absolutely delicious for a hot afternoon.
Frequently Asked Questions
Yes, but you must stabilize the whipped cream with gelatin or a heavy dose of powdered sugar. Otherwise, the dessert may lose its height and ‘pillowy’ volume over time.
It is best to use standard Oreos for the base. Double Stuf cookies have a higher cream-to-cookie ratio, which can prevent the base from compressing into a firm, solid foundation.
The secret is freezing the dish for 5-10 minutes between each layer. This creates a firm surface so the next layer can be spread without mixing into the one below.
Because of the cream cheese and whipped topping, it should not sit out for more than 2 hours. Keep it chilled until the moment you are ready to serve.
Ensure you are using Instant pudding, not the ‘cook and serve’ variety. Also, using cold whole milk is essential for the chemical reaction that thickens the pudding instantly.
The Ultimate No Bake Oreo Dessert Recipe
No Bake Oreo Dessert: The Ultimate 4-Layer Chocolate Lasagna
Ingredients
Equipment
Method
- Pulse 36 cookies in a food processor until fine. Mix with melted butter.
- Press into the bottom of a 9x13 dish and freeze for 10 minutes to set.
- Mix cream cheese and powdered sugar until fluffy. Fold in 8oz whipped topping.
- Layer over the crust using an offset spatula for a level finish.
- Combine pudding mix and milk; whisk for 2 minutes until glossy and thick.
- Pour over the cream cheese layer and smooth immediately.
- Spread the remaining whipped topping over the pudding to create soft peaks.
- Decorate with jagged Oreo chunks and a drizzle of melted dark chocolate.
Notes
Wipe your knife with a warm cloth between cuts for professional visual results.
Conclusion: A Slice of Chocolate Heaven
Mastering the no bake oreo dessert is about more than just mixing ingredients; it’s about creating a visual and textural experience that lingers long after the last bite. With its jet-black base, snowy fluff, and glossy pudding, it is the ultimate expression of chocolate decadence. We hope this recipe brings a little extra sweetness to your table!
If you enjoyed making this Oreo lasagna, please leave a comment below and let us know how your layers turned out! Don’t forget to share your creations and follow us on Pinterest for more culinary inspiration and high-RPM recipe secrets.