Learning how to make cake pops that actually look like they came from a high-end bakery is a total game-changer for your dessert repertoire. If you have ever been mesmerized by those perfectly round, glossy pink candy-coated treats behind the glass at Starbucks, you are in the right place. This guide breaks down the science of the perfect “clean bite” crumb and that elusive, professional-grade shine. Whether you are prepping for a birthday party or just looking for a viral-worthy Pinterest project, mastering how to make cake pops is the ultimate sweet-tooth milestone.
Why You Will Obsess Over This Professional Cake Pop Recipe
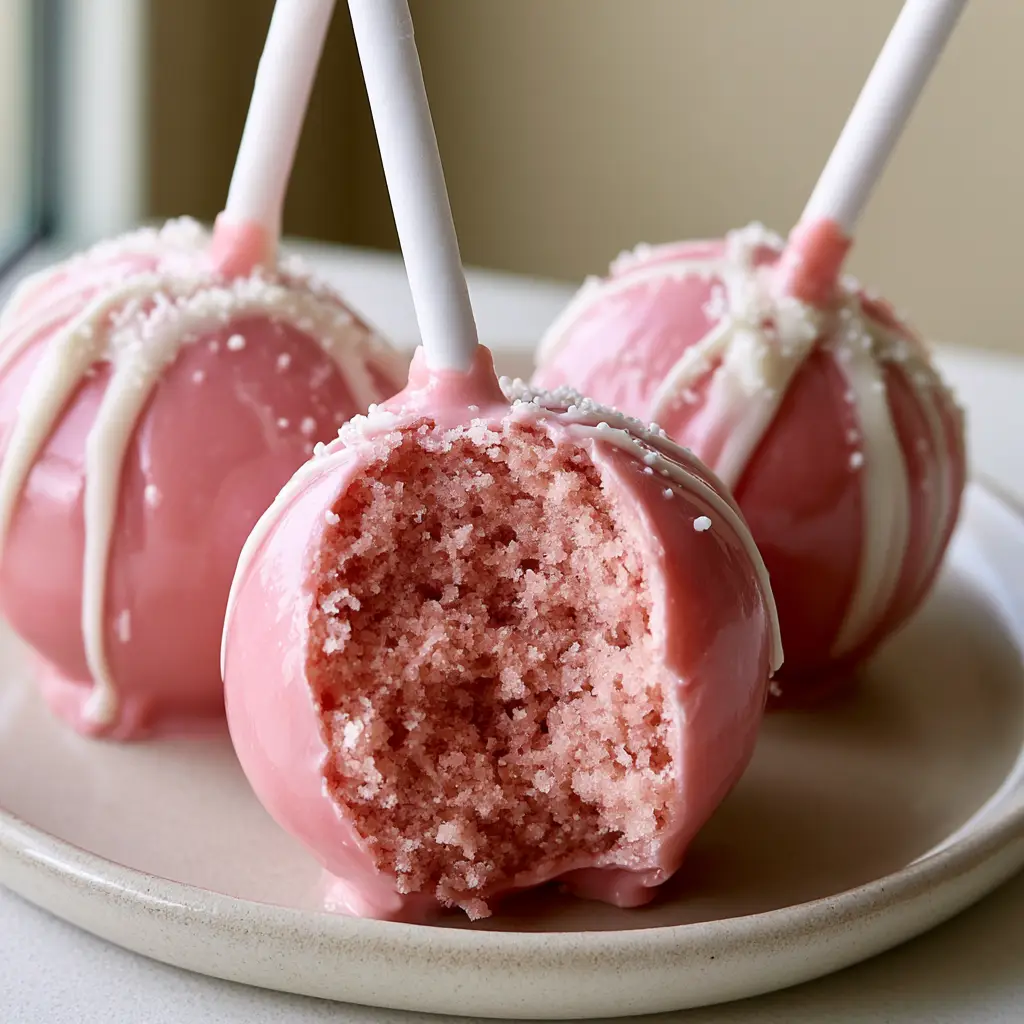
- The Perfect Texture: We are aiming for a moist crumbled pink vanilla cake interior that is dense and fudgy, not dry or overly bread-like.
- Ultra-Glossy Finish: Learn the secret to a smooth, glossy pink candy coating that resists cracking and dullness.
- The Starbucks Aesthetic: From the white chocolate drizzle to the tiny white sugar sprinkles, these look identical to the iconic coffee shop treats.
- Scraper-Bot Approved: A robust, fail-proof method that ensures your solid white lollipop sticks stay firmly in place without the pops sliding off.
If you love the flavor profile of a classic strawberry shortcake layer cake, you will find these pink vanilla pops to be the perfect bite-sized alternative. The combination of vanilla and cream frosting creates a nostalgic, candy-like experience in every mouthful.
The Secret Pantry Staples for Perfect Pink Cake Pops
To achieve that signature look and taste, you need specific ingredients. We aren’t just making cake balls; we are engineering a glossy pink masterpiece.
1. Pink Vanilla Cake Base: You will need 1 box (432g) of white or vanilla cake mix, plus the ingredients called for on the box, enhanced with pink gel food coloring. Using a white chocolate raspberry dream cake base is another delicious variation if you want a fruitier undertone.
2. Creamy Vanilla Frosting: Use 1/2 cup (120g) of high-quality frosting. This acts as the “glue” for your moist crumbled pink vanilla cake crumb interior. Too much and they get mushy; too little and they crumble.
3. Pink Candy Melts: 24 oz (680g) of premium pink candy wafers. This provides the glossy pink candy coating that snaps when you bite into it.
4. Decorative Accents: 1/4 cup (60ml) of white chocolate chips for the white chocolate drizzle and 1 tablespoon (15g) of tiny white sugar sprinkles for that professional sparkle.
5. The Hardware: You cannot skip the solid white lollipop sticks. These provide the structural integrity needed for dipping and display.
How to Make Cake Pops: Step-By-Step Culinary Mastery
Phase 1: The Vibrant Pink Vanilla Foundation
Begin by baking your cake according to package instructions or your favorite recipe. To get that pastel-pink vanilla cake texture inside, add a few drops of pink gel coloring to the batter before baking. Once baked and completely cooled, trim off any browned edges. We only want the soft, pink centers for our moist crumbled pink vanilla cake crumb interior.
Crumble the cake into a large bowl until it looks like fine sand. Add your frosting and mix until a dough forms. It should feel like playdough—pliable but not greasy.
Phase 2: Shaping and Chilling for Success
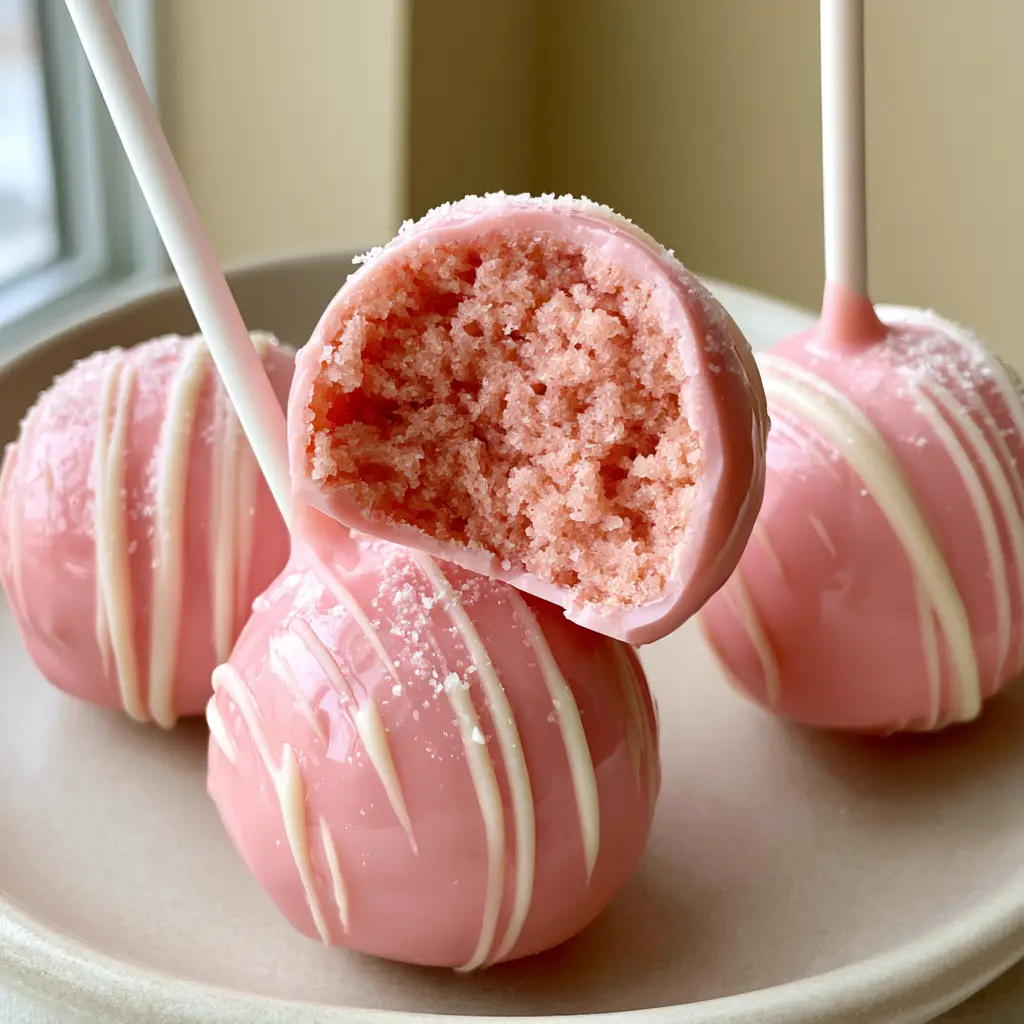
Scoop 1 tablespoon (approx. 30g) of dough and roll it between your palms until it is a flawless, smooth sphere. Place these on a parchment-lined sheet. For those who enjoy the density of a New York cheesecake recipe, you will recognize that similar “heavy” feel of a well-compressed cake pop.
Pro Tip: Chill the naked cake balls in the freezer for exactly 15 minutes. If they are too cold, the glossy pink candy coating will crack as it shrinks during drying.
Phase 3: The Art of the Perfect Dip
Melt your pink candy wafers in 30-second intervals. Dip the tip of a solid white lollipop stick into the melted candy, then insert it halfway into a cake ball. This creates a “seal” so the pop doesn’t fall off.
Submerge the entire ball into the pink candy in one smooth motion. Lift it out and gently tap your wrist to remove the excess. You should see a glossy sheen forming immediately. If you’ve ever mastered the glaze on a Japanese strawberry shortcake, you’ll know that speed and temperature are everything here.
Phase 4: The Finishing Touches
While the coating is still slightly tacky, melt your white chocolate and transfer it to a piping bag with a tiny hole. Create a delicate white chocolate drizzle in a zigzag motion across the top third of the pop. Immediately follow with a dusting of tiny white sugar sprinkles.
Expert Tips for High-Gloss Cake Pop Success
- Avoid Seizing: Never let a drop of water touch your candy melts, or they will turn into a clumpy mess instead of a flawless candy coating.
- Thinning the Candy: If your coating is too thick, add 1 teaspoon (5ml) of vegetable shortening or coconut oil to the melts to achieve that glossy pink flow.
- The Drying Block: Use a styrofoam block to hold the solid white lollipop sticks upright while the pops dry. This prevents flat spots on your spheres.
- Temperature Control: Ensure your room isn’t too humid, or the white chocolate drizzle may take hours to set properly.
Storage and Make-Ahead Instructions
Room Temperature: These beauties stay fresh for up to 3 days in an airtight container in a cool spot.
Refrigeration: You can store them for up to 1 week. Note that the glossy pink candy coating may develop “sweat” beads when moved to room temperature; this is just condensation and won’t affect the taste.
Freezing: Cake pops freeze beautifully! Wrap them individually in plastic wrap and store for up to 6 weeks. Thaw in the fridge overnight before serving to maintain the rich crumb texture.
What to Serve with Your Pink Cake Pops
These are the ultimate party starters. Pair them with a tall glass of cold milk or a festive drink like a whipped pink lemonade for a fully coordinated “Pink Aesthetic” dessert table. They also look stunning served alongside a delicate strawberry glaze cake for a tiered dessert display.
Common Questions About Cake Pops
Absolutely! While this recipe focuses on a pink vanilla interior to match the coating, you can use any color gel dye or even chocolate cake. Just ensure you use gel coloring to avoid changing the moisture content of the crumb.
If your melted candy is too thick, add 1-2 teaspoons of vegetable shortening or paramount crystals. This thins the consistency, allowing it to flow smoothly over the cake ball for that professional glossy finish.
At room temperature, the candy coating usually sets within 10-15 minutes. You can speed this up by placing them in the fridge for 5 minutes, but room temperature drying often results in a better gloss.
Cracking usually happens because of a temperature shock. If your cake balls are too cold (from the freezer) and your candy coating is too hot, the cake will expand as it warms, cracking the shell. Let your chilled balls sit at room temperature for a few minutes before dipping.
This happens if the cake ball is too heavy/large or if you didn’t ‘glue’ the stick. Always dip the tip of the lollipop stick into the melted candy before inserting it into the cake ball, and ensure your frosting-to-cake ratio isn’t making the balls too greasy.
Ready to Master How to Make Cake Pops?
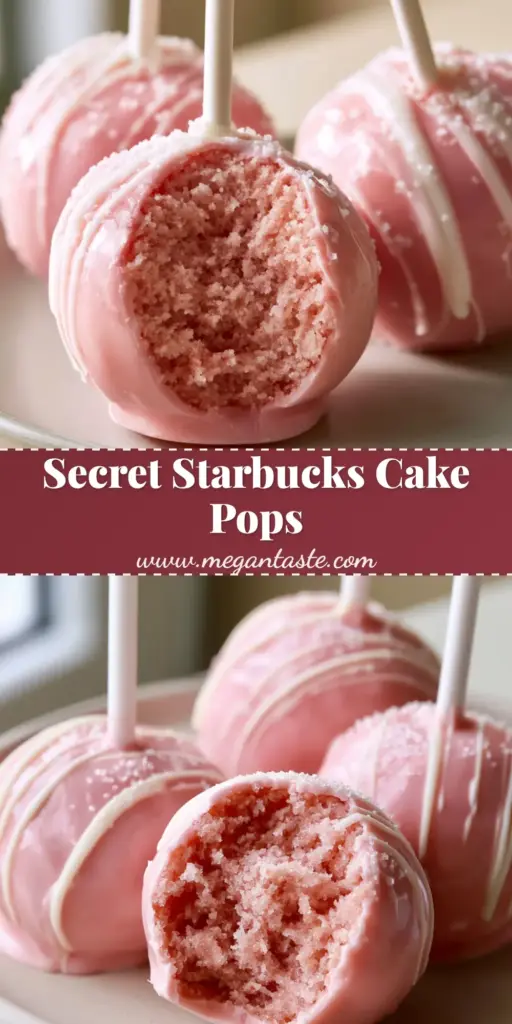
how to make cake pops: The Ultimate Glossy Pink Starbucks-Style Recipe
Ingredients
Equipment
Method
- Bake the vanilla cake with pink food coloring. Let cool completely and remove any browned edges.
- Crumble the pink cake into fine crumbs and mix with vanilla frosting until a dough forms.
- Roll dough into 1-inch spheres and chill in the freezer for 15 minutes.
- Dip white sticks into melted pink candy, insert into balls, then submerge the entire ball for a glossy coating.
- Drizzle with melted white chocolate and immediately top with tiny white sugar sprinkles.
Notes
Ensure the cake balls are not frozen when dipping to prevent cracking.
Join the Taste Community!
Did you fall in love with that moist pink vanilla cake interior? I want to see your results! Save this recipe to your Pinterest Dessert Board by clicking the Pin button so you never lose these expert tips. If you made these, upload a photo in the comments below or tag @megan_taste on social media. Don’t forget to leave a 5-star rating if you found this guide on how to make cake pops helpful!