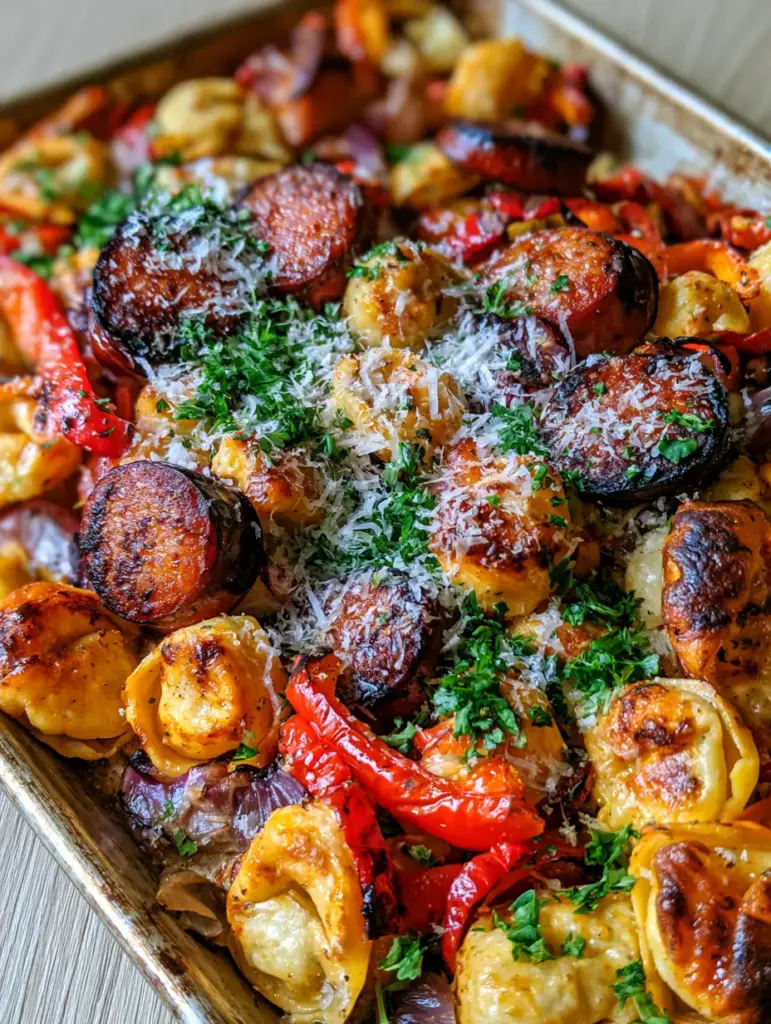
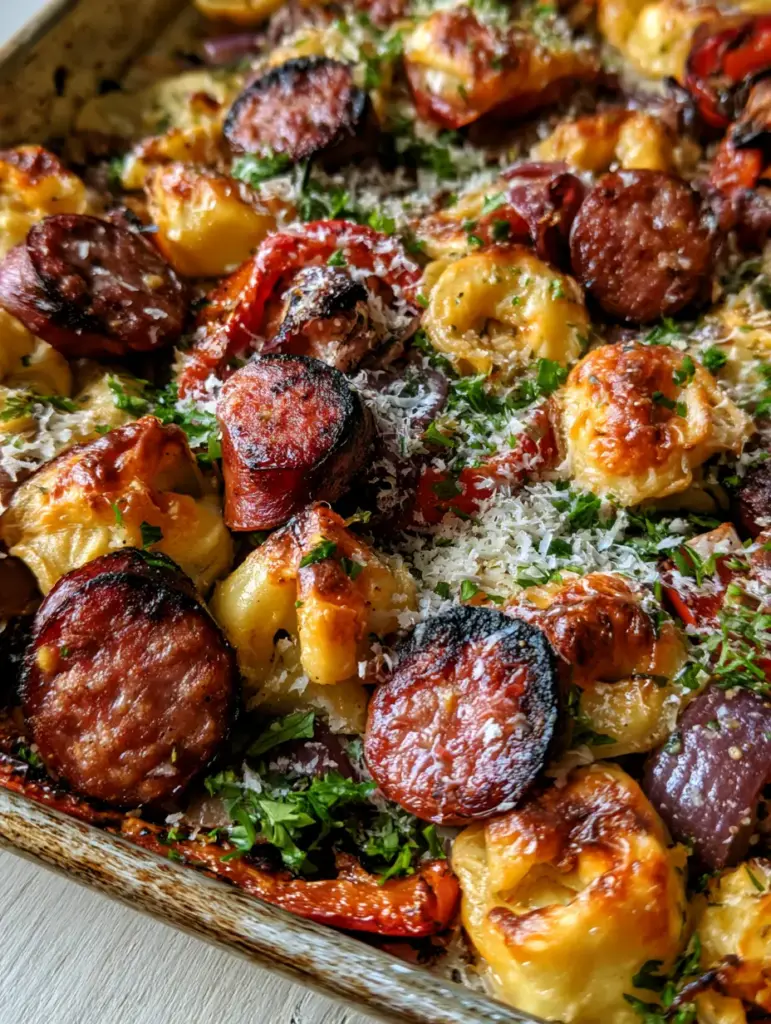
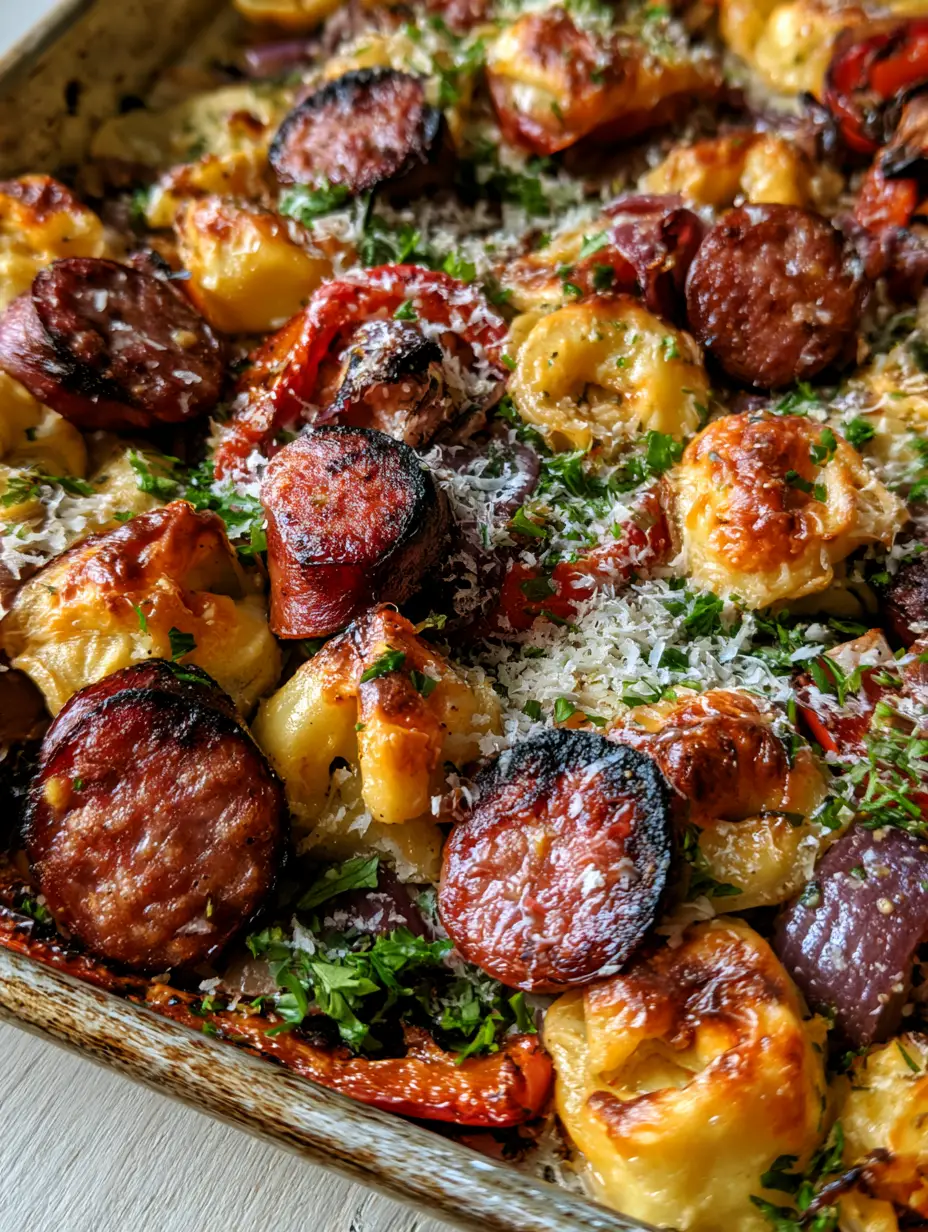
Sheet Pan Kielbasa and Tortellini is the ultimate weeknight revelation for anyone who craves the comforting texture of pasta but hates the hassle of boiling water. Imagine seared kielbasa coins with dark, caramelized edges nestled against crispy roasted cheese tortellini that have been blistered to golden perfection in the oven. This isn’t your standard mushy pasta dish; it is a high-heat, flavor-packed meal featuring charred red bell peppers and softened red onions that caramelize right on the pan.
If you are scrolling through Pinterest looking for a meal that looks as good as it tastes, this is the one. The olive oil glaze creates a shimmering finish, while a heavy snow-fall of freshly grated parmesan cheese and bright green parsley adds that final gourmet touch. This Sheet Pan Kielbasa and Tortellini recipe is designed for maximum flavor with minimal cleanup, making it a viral-worthy addition to your rotation.
Why You Will Love This Crispy Roasted Tortellini Dinner
- The Texture Revolution: Unlike boiled pasta, these tortellini become firm and toasted with a satisfying “snap” on the outside and a melty cheese center.
- Zero-Pot Cleanup: Everything, from the seared smoked kielbasa slices to the vegetables, happens on a single rustic metal sheet pan.
- Maillard Reaction Magic: High-temperature roasting coaxes out the natural sugars in the red onions and bell peppers, creating deep, charred flavors you can’t get on the stovetop.
- Perfect for Meal Prep: This dish stays firm and delicious even after reheating, unlike traditional pasta which can get soggy.
Before we dive into the method, if you love the ease of one-pan meals, you should definitely check out my Sheet Pan Chicken Pitas or this incredibly flavorful Sheet Pan Honey Dijon Chicken. For those who love the combination of sausage and starch, my Sausage and Sweet Potatoes is another must-make.
Essential Ingredients for the Ultimate Sheet Pan Kielbasa and Tortellini
To achieve the Visual Recipe Blueprint we are aiming for, each ingredient serves a specific culinary purpose. We aren’t just tossing things on a tray; we are building layers of flavor and texture.
- Smoked Kielbasa: 14 oz (397g). Look for a high-quality smoked sausage. Slicing these into 1/2-inch coins ensures maximum surface area for those dark caramelized edges.
- Refrigerated Cheese Tortellini: 20 oz (567g). CRITICAL: Use refrigerated, not dried. Refrigerated pasta has the moisture content needed to steam internally while the outside crisps up.
- Red Bell Peppers: 2 large (300g). These provide the charred red bell pepper strips that offer a sweet, smoky contrast to the savory meat.
- Red Onion: 1 large (150g). Sliced into wedges, these become caramelized red onions that melt into the background glaze.
- Extra Virgin Olive Oil: 3 tbsp (45ml). This creates the essential olive oil glaze that facilitates even browning and prevents sticking.
- Garlic Powder & Italian Seasoning: 1 tsp (5g) each. These aromatics infuse the oil and coat every crevice of the pasta.
- Parmesan Cheese: 1/2 cup (50g). Grated parmesan cheese is essential for that salty, umami finish.
- Fresh Parsley: 1/4 cup (15g). Finely chopped bright green parsley provides the visual pop and a fresh herbal finish.
How to Master the Sheet Pan Kielbasa and Tortellini Method
The secret to the Sheet Pan Kielbasa and Tortellini is heat management. We want the oven hot enough to blister the pasta without drying out the interior cheese filling.
1. The High-Heat Prep
Preheat your oven to 400°F (200°C). While the oven heats, place your rustic metal sheet pan inside. A preheated pan ensures that the seared kielbasa coins start sizzling the moment they touch the surface.
2. The Seasoning Toss
In a large bowl, combine the tortellini, kielbasa slices, bell pepper strips, and onion wedges. Drizzle with the olive oil and sprinkle the dry seasonings. Toss thoroughly. You want every piece of pasta to have a thin, shimmering olive oil glaze. This is what creates that golden-brown roasted cheese tortellini texture.
3. The Strategic Spread
Carefully remove the hot pan from the oven and spread the mixture in a single layer. Crowding is the enemy of crispiness. If the ingredients are piled on top of each other, they will steam instead of roast. You want to see the metal of the pan between the ingredients.
4. The Blistering Roast
Roast for 18-22 minutes. At the halfway mark, use a spatula to toss the ingredients. Look for Visual Cues: The tortellini should look toasted and firm, the kielbasa should have dark caramelized edges, and the peppers should show visible char marks.
5. The Signature Finish
Immediately upon removing from the oven, while the pan is still sizzling, hit the dish with the heavy sprinkle of freshly grated parmesan cheese. The residual heat will slightly melt the cheese, helping it adhere to the crispy surfaces. Garnish with the fresh chopped parsley for that handheld smartphone food photography aesthetic.
Expert Tips for Pinterest-Perfect Results
- Don’t Boil the Pasta: I cannot stress this enough. Roasting the tortellini raw (refrigerated) is what gives them that unique, addictive “blistered” texture. Boiling them first will result in a mushy mess.
- Slice Uniformly: Keep your kielbasa coins and pepper strips roughly the same thickness so they finish cooking at the exact same time.
- Use a Dark Pan: A dark metal sheet pan absorbs more heat than a shiny aluminum one, leading to better charred red bell pepper edges and crispier pasta bottoms.
- Check for Doneness: The tortellini are done when they puffed up slightly and feel firm to the touch, not soft.
Storage, Reheating & Freezing Instructions
To Store: Keep leftovers in an airtight container in the refrigerator for up to 3 days. The flavors actually deepen as the caramelized red onions sit with the sausage.
To Reheat: For the best results, avoid the microwave. Reheat on a sheet pan at 350°F (175°C) for 10 minutes to maintain the crispy blistered texture. If you are in a rush, a quick toss in a dry skillet also works wonders.
To Freeze: I do not recommend freezing this specific dish once cooked, as the roasted tortellini texture will change significantly upon thawing. However, you can freeze the raw ingredients (except the onion) separately.
What to Serve With Sheet Pan Kielbasa and Tortellini
Since this is a hearty meal, I recommend light, acidic sides to balance the richness of the seared smoked kielbasa. A simple arugula salad with lemon vinaigrette works beautifully.
If you want to keep the “one-pan” theme going, try serving this alongside my Sautéed Asparagus with Garlic and Butter or these Garlic Potatoes and Green Beans for a full feast. If you love pasta-based appetizers, these Caprese Tortellini Skewers are the perfect companion for a party spread.
Frequently Asked Questions
Absolutely! Zucchini or broccoli florets work great, but be sure not to overcrowd the pan, or the ingredients will steam instead of getting those crispy, charred edges.
You can, but you must thaw them completely and pat them dry first. Frozen tortellini contain extra moisture that can prevent the ‘blistering’ effect we want on the sheet pan.
Correct! For this Sheet Pan Kielbasa and Tortellini, using refrigerated tortellini allows them to steam inside while the oven heat crisps the exterior. Boiling them first will make them too soft to roast.
This usually happens if you didn’t use enough olive oil or if you didn’t preheat the sheet pan. The ‘olive oil glaze’ is crucial for both flavor and creating a non-stick barrier.
A fully cooked smoked kielbasa or polska kielbasa works best. Because it is already cooked, you are simply focused on achieving those dark caramelized edges in the oven.
The Complete Sheet Pan Kielbasa and Tortellini Recipe
Sheet Pan Kielbasa and Tortellini with Roasted Peppers
Ingredients
Equipment
Method
- Preheat your oven to 400°F (200°C) and place a large metal sheet pan inside to get hot.
- In a large bowl, toss the tortellini, sliced kielbasa, bell peppers, and onions with olive oil, garlic powder, and Italian seasoning until well coated.
- Spread the mixture onto the hot sheet pan in a single layer. Roast for 20 minutes, tossing halfway through, until tortellini are blistered and kielbasa is seared.
- Remove from oven and immediately top with grated parmesan and fresh parsley.
Notes
Tip 2. Ensure the pan is not overcrowded; use two pans if necessary to achieve the perfect char.
Join the Community!
I am so excited for you to try this Sheet Pan Kielbasa and Tortellini! It has become a staple in my kitchen because of that incredible crispy roasted cheese tortellini texture. If you make this, please save it to your favorite Pinterest board so you don’t lose it! Follow me at megan_taste for more easy, viral-worthy dinner ideas.
Did yours turn out perfectly charred? Snap a photo and share it in the comments below! I love seeing your recreations. Don’t forget to leave a 5-star rating if this dish leveled up your weeknight dinner game!